
Northern India Cooking Class; Lesson 6: Chapatis

Chapatis
Peggy Lampman | Contributor
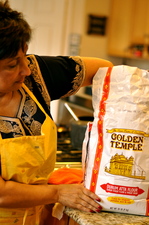
Begin with the right flour.
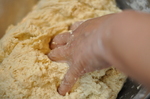
When kneading dough, it's important to get the flour/water ratio correct.
Roll dough into balls.
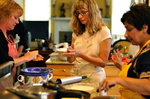
Making chapatis were, unquestionably, the most entertaining part of our cooking class. And though there were only a few ingredients in the recipe, of all the recipes for me, the chapati was the most challenging to master.
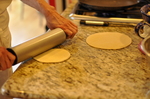
Roll dough balls into disks.
We each took a turn at the griddle; some puffed, some didn't. My excuse for not getting my chapati to puff the first time is I was too busy taking photographs to focus on Achla's technique: the flip of the chapati and the pressing down of the bubbles with a spatula.
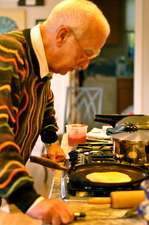
Why won't mine puff?
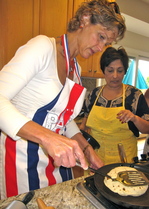
Achla coached us on the sidelines as we flipped, pressed and cheered each other on.

Just press the bubbles!
Here are some links Peter, one of the cooking class participants, sent me regarding the "art" of chapati making.
This first one — guys making chapati then tossing them across the kitchen — was far more amusing than watching footballs being tossed across the field during the Michigan and Alabama football games last weekend: http://www.youtube.com/watch?v=4TbzuNfyQE4
"Friends in Singapore tell me they toss the "parathas", which are really chapatis. So when I offered to make parathas for breakfast one morning they were expecting a show. They were quite disappointed that I just made them on the griddle," Achla said after watching the above video.
The second video is inspirational, as well. Achla tells me that in the north, every neighborhood has a tandoor - you can take your own dough and have them make it for you, or just buy them. She says they only make them in the fall and winter, when it isn't blazing hot outside.
http://www.youtube.com/watch?v=sLDJiG1m4_U&feature=related
"This, Peter, is how it's done."
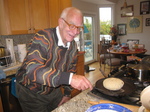
Success at last!
Wasn't that easy?
YIeld: 1 of 7 recipes comprising an Indian Feast to serve 16 (3 1/2 - 4 dozen)
Make ahead tips: Dough may be made in advance and covered up to 4 hours. Chapatis may be made several hours in advance and wrapped in a clean cloth.
Ingredients:
5 cups Durum Atta Wheat Flour, plus extra flour for dusting and rolling chapati dough
3-4 cups water, room temperature
Melted butter or ghee as needed
Directions
1. Pour flour into a large bowl. Make a well in the flour and slowly add water, in quarter cup increments, while incorporating into flour with clean hands. Knead as you would bread, the amount of water added depends on the humidity, type of flour used and other ambient conditions.
2. Keep kneading and gathering the dough, seven or eight minutes, so it does not stick to the sides of the pan. The consistency of the batter should be not be sticky. Gather the dough into a ball and cover pan with a damp cloth. Let dough rest one hour and up to four hours, at room temperature.
3. Once you are ready to start, remove the cloth from the dough and add oil to the side of the pan, or transfer it in an easily accessible smaller bowl, if desired
4. Divide dough into pieces about the size of large golf balls and lightly cover.
5. Roll it into a tight ball between lightly compressed palms (you want to avoid any seams) and make as smooth a ball as possible. Place flour on work surface or plate, dust palm with flour, and flatten each ball in the flour, pressing each ball into the flour.
6. Remove from flour and on a floured surface, flatten the dough with a rolling pin, rolling from the center with light strokes, until the disk is 7 to 8 inches in diameter. If it starts to stick to the rolling pin or the counter, gently lift it up and cover both sides with more dry flour. Keep rolling until the disk is 7 to 8 inches in diameter. Do not turn over. Set aside and repeat with several of the remaining dough balls; do not stack rolled-out dough.
7. Meanwhile, place dry griddle or low-lipped saute pan on the stove and heat over high, until griddle is hot (Hold your hand two inches above the griddle; when your palm feels hot, the griddle is ready.)
8. Place a chapati disk on the griddle and let it cook 10-15 seconds; with a spatula, gently flip over. Cook until small bubbles begin to form in the dough, about one minute. Turn the chapati over and finish cooking another minute. At this stage the chapati should begin to balloon. The process can be accelerated by pressing the bubbles with your spatula. (If the bread begins to burn before ballooning, shake the pan and press chapati gently encouraging it to puff.) After it balloons, remove to a platter and brush with melted butter or ghee.
9. Continue cooking and stacking the breads, brushing with ghee. You may wrap cooked chapati in paper towels or a clean cloth for several hours to keep the breads soft and warm, if desired. Wrap leftovers in paper towels and then foil. They will keep several days refrigerated; reheat prior to serving.
Comments
Jeff Renner
Wed, Nov 9, 2011 : 2:36 a.m.
A trick for puffing up chapatis is to flip them onto a wire rack on top of a gas burner or hot electric element for a few moments after cooking them on the griddle. This also works for homemade corn tortillas. They almost always always puff right up, even if they didn't on the griddle. It takes a bit of attention to make sure the wire doesn't burn through the chapati, which will deflate it.