
Drywall repair in less than an hour
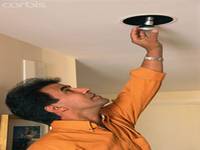
Photo by corbisimages
Hi Keith,
I had to move a ceiling light about two feet from the existing light. How do I repair the drywall in the ceiling quickly before my in-laws arrive this weekend?
-Mark L. Saline
Hi Mark,
Thanks for writing. One of the home repair projects that I enjoy doing most is drywall repair. When done properly, your finished product is a work of art, (of course only if you can’t see it). Your goal is to make it appear that there never was a repair. With a little patience, it can be performed by the novice do-it-yourself-er.
Tools and materials you’ll need: 4-inch, 8-inch and 12-inch drywall knives, retractable blade utility knife, drywall mud pan, five-minute powdered drywall mud, scrap piece of drywall, scrap 2x4, 1.5-inch drywall screws, sanding block, primer and matching ceiling paint.
1. Measure the thickness of the drywall. Pick up equal thickness drywall and at least three inches wider than the opening. Most hardware stores that carry drywall also sell scraps for a few dollars.
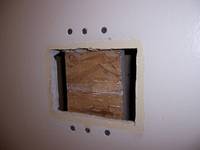
2. Cut the round ceiling hole so that it is square. This step will make it easier to match the new drywall. Then cut a piece of drywall 1.5 to 2 inches larger than the perimeter opening.
3. Here is one of the main tricks that will help you avoid having to use drywall tape on the seams. Using the existing replacement drywall, carefully cut the backside with a utility knife, while leaving the front drywall paper facing intact. The facing will be used to cover the seam.
4. Next, take a piece of scrap 2x4 wood or a five-gallon wooden paint stick, insert into the back of the ceiling drywall, exposing the wood through the hole. Now secure the wood on both ends with drywall screws through the ceiling. This will become your support for the new drywall piece.
5. Attach the drywall by screwing it to the exposed wood support, covering edges with the front face paper.
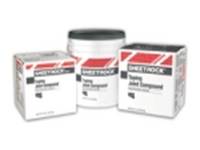
Photo by USG.com
6. Next, you will need to mix a small amount of five-minute drying drywall mud. Follow the mixing instructions carefully. Then apply the mud to the underside of the front face paper, allowing it to adhere to the ceiling. Finish your first drywall coat with the 4” putty knife, spreading or “feathering” the mud along the edges of the seams. One of the best tips I have received is to apply very thin coats of mud. Five-minute mud is difficult to sand. If you think it is too thin, it’s probably just right.
7. Let dry and sand smoothly. Then reapply thin coats of drywall mud spreading evenly over each coat with an 8-inch and 12-inch knife.
Lastly, take a flashlight and set it against the ceiling, allowing the light to show any imperfections over the repair. Sand and apply additional mud as necessary, and you’ll have an undetectable repair. Prime and paint with a ¾-inch or 1-inch nap roller. The same process can be used for door knob holes. Sit back and admire your ceiling work of art. Of course, the challenge will be admiring something you can’t see….
Paul is a State of Michigan Licensed Builder. Paul serves as President and founding member of Nationally franchised HandyPro Handyman Service, servicing Washtenaw, Wayne and Oakland Counties. www.handypro.com. Listen to Paul every Saturday at 11 a.m. on “It’s Your Home, Let’s Talk About It” WAAM Talk 1600AM. Email questions or comments to kpaul@handypro.com.
Comments
Keith A. Paul
Mon, Dec 6, 2010 : 9:02 a.m.
Thanks for the comment Bobby Frank. I agree, and often say, if you are uncertain and it is invisible and can kill you, (like gas and electricity), hire a licensed professional.