
Is your drywall cracking you up?
How can I repair a crack in my drywall ceiling, for good? Angie R. Salem Twp, MI
The reasons for drywall cracks can vary, the most common reason is unsupported drywall. However it could range from thermal movement in summer and winter due to the varying temperature and humidity, into a more serious cause such as abnormal subsidence or foundation and structure issues.
Because unsupported drywall is the most common reason for cracking, we’ll give a step by step on repairing the cracks - for good.
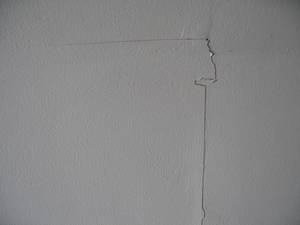
Crack in drywall
Whether the crack is in the seam or in the middle of the drywall, the process to repair them are the same. First the drywall MUST be secure. If there is any movement when pressure is applied to the drywall, it will cause the crack to reappear. Secure any loose drywall to a stud or ceiling joist. If the crack is small, unsupported, and not at a seam, cut a small hole, insert a 2X4 that is longer than the crack behind the drywall and re-secure along both sides of the crack with drywall screws. Note: This is only for smaller repairs.
Next, remove any loose debris including loose drywall tape, paint and drywall. Then take a utility knife and notch the crack at a 45 degree angle making the crack into a “V-notch” approximately 1/8 to 1/4 inch deep. Cover the crack with a piece of drywall mesh tape. Next, with a 4” drywall knife cover the mesh tape, (and crack) with a thin layer of drywall mud. One of the best pieces of advice that I have received is: if you think the layer of mud is a little thin, then it is perfect. Stop and let dry. There will be less sanding. I’ve always been of a fan of working smarter not harder. Sand the area smooth with 120 grit sandpaper, repeat the process above using an 8 inch drywall knife, and a third time using a 12 inch drywall knife.
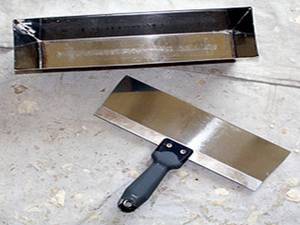
Handy Tools
Safety Tip: Before starting a project that consist of drywall and paint wear a mask and properly cover the work area with plastic drop cloths. If your home was built before

Paul is a State of Michigan Licensed Builder. Paul serves as President and founding member of Nationally franchised HandyPro Handyman Service, servicing Washtenaw, Wayne and Oakland Counties. www.handypro.com. Listen to Paul every Saturday at 11:00am on “It’s Your Home, Let’s Talk About It” WAAM Talk 1600AM. Email questions or comments to kpaul@handypro.com