
Organizing home manuals is a quick and satisfying evening project
Sarah Finks | Contributor
Materials:
1) Manuals
2) Large binder
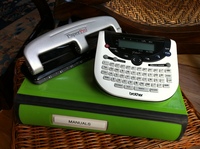
3) Hole punch (triple works best but a single will work just as well.)
4) Dividers with pockets
5) Label maker (not necessary but if you have one, great.)
Instructions:
1) You can organize these anyway you want — alphabetically or by room. I organized mine by room, since it is easier for me to think "kitchen" when my dishwasher acts up. But that is just me. It's important to do what works for you. I have tried having them all on my computer but find it a hassle to have to go to the computer and wait for it to open. Also I find the book is nice because you can take it anywhere you want — the computer less so.
2) Label your dividers by hand or with your fancy label maker.
3) Punch holes in all of your manuals and add them to your binder in the corresponding section.
4) Use the pockets for small items like warranty cards or manuals that are to thick to punch holes through.
That's it. No more rummaging around for the right manual when something breaks. Now it is organized and easy to find in your little binder. Go find a good place to put it, somewhere you won't forget.
* I can't take all of the credit for this awesome project. I was watching Jon and Kate Plus 8 last year when my boys were really little. Watching J&KP8 back then was great, it made me think "it could be worse." Isn't that terrible?
Anyway, Kate asked her assistant to make one for her so she could stay organized. Well no assistant for me — I only wish. But I have a binder now, anyway. So thanks Kate, for more reasons than one.
For more organizing tips, click here and follow Ask Betty for the month of January as she helps us all get organized.
Sarah Finks is a local mom and blogger trying to find order amongst the chaos of three small boys and a wonderful husband. Feel free to e-mail me at threeboys.home@gmail.com or check out my blog at threeboys-home.blogspot.com for more household tips.