
Repair a crack in the grout yourself
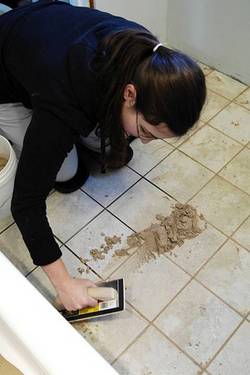
Repair crack
Photo by Flickr user hipengr
I have a crack in my grout line for my 10-year-old bathroom ceramic tile floor. How can I repair this without tearing up the entire floor?
- Beth R. Salem Township
Congratulations on taking the time to tackle this project by yourself. Leaving cracks in the grout (especially in a bathroom) can allow water to seep into the floor and cause further damage. In fact, I’ve had to tear up entire bathroom floors because this type of repair was not completed in time. In your case, determining the cause of the crack is the first and most important task.Â
There are many reason for grout cracks in tile floors, but the two most common are unsecure floors and improper maintenance.
First, the floor must be secure and free from any movement. Similar to ice on the Michigan roads, the slightest shift with the floor will cause the strongest grout and tile to give way. This generally occurs due to improper installation. Because your floor is ten years old, this is probably not the case.
The second thing to consider is floor maintenance. Grout is construction material mainly composed of water, cement and sand, and it needs proper cleaning and sealants. A grout sealer typically is silicone- or water-based and used to protect the grout against water, dirt, mildew and other contaminants. Over time, the sealer will lose its effectiveness and should be reapplied every two to three years depending on the use of the floor.
To repair the worn grout, follow these steps:
1. Remove the damaged grout with a grout saw or grout scraper. This is a manual tool which looks like a sanded edged razor blade with a handle. The cost is approximately $8 and can be purchased at most local hardware stores.
2. Clean all debris and wash with mild soap and water.
3. Choose your grout carefully. If your joints are 1/8-inch or larger you should use sanded grout. For smaller joints use unsanded grout. If you have extra grout left over from the original installation of the floor, I recommend using that because it will make matching the grout much simpler.
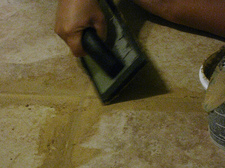
Grout repair
Photo by evelynisheres
5. Fill a bucket with water and use a large sponge to smooth the grout while removing most of the excess. Let it sit for approximately 20 minutes and use the sponge and water to remove any excess grout or haze.
6. Let the grout cure for a minimum of three days and then apply sealer according to the manufacturer's instructions. I recently tested a sealer at my own house called One Step Floor Grout Sealer from Tile Guard. Although it was a strong odor, I liked the ease of application. For more information, visit the Tile Guard company Web site.
Remember, the most important part of any do-it-yourself project is to have fun and then sit back and feel the pride of your accomplishment for a job well done.
Good luck!
Keith Paul is a state of Michigan licensed builder. He serves as president and founding member of HandyPro Handyman Service and nationally franchised HandyPro International. Listen to Paul every Saturday at 11 a.m. on “It’s Your Home, Let’s Talk About It” WAAM Talk 1600AM. E-mail your home improvement questions to kpaul@handypro.com.