The basics of painting a room

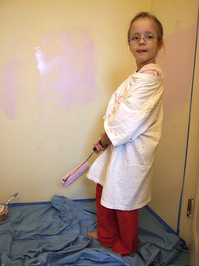
Learning to paint.
Photo by Ken B. Miller
“I’m going to paint my living room, and I have never painted before. Any advice?”
- Steve P., Whitmore Lake
Taking the time to properly prepare a room for painting can make the job easier and ensure good results. Keep in mind that preparation often takes more time than actual painting.
One of the big jobs on many homeowners' “To Do” lists is interior painting. But painting is something homeowners don’t do frequently, and they may not know the tricks of the trade to ensure the job is done properly. Many first-time homeowners have never painted a room before and aren’t sure where to start.
If homeowners spend more time preparing a room for painting than actually painting it, they will find the project is easier and the results will be much better.
Here are a couple of basic room preparation tips before painting:
• Remove what furniture you can, move what‘s left into the center of the room, and then cover with drop cloths.
• Tape around moldings, doors and windows using removable safety masking tape specially made for painting.
• Remove any heating and cooling air vents and cover plates from electrical outlets and light switches.
• Sand or scrape loose and flaky paint with light sandpaper or a paint scraper.
• Fill all nail and screw holes from pictures with a putty knife and spackling compound.
• If the walls and ceiling of the room are dirty, wash them with trisodium phosphate (TSP) prior to painting. Allow walls to dry completely prior to painting.
• Spread a canvas drop cloth over the floor to keep paint drips and spills from ruining your carpet.
Once the room is prepared, plan on at least two coats of paint to ensure proper coverage. Start by using a paint brush to paint trim around doors and windows, then in the corners of walls and ceilings.
After doing the trim, use a paint roller (and an extension handle if necessary) to roll the paint on the walls and ceilings. It’s best to start with the ceiling first and then proceed to the walls.
When painting with a roller, homeowners should take one section at a time, roll a “W” and then fill it in. This assures an even application of paint.
After the room is painted, make sure to mark the remaining paint cans with the name of the room it was used on. Many of us often save paint but don’t know which room it was used for; by marking the cans, it’s easy to find the right paint when you need to touch up a room a year or two later.
Paul is a State of Michigan Licensed Builder. He serves as president and founding member of HandyPro Handyman Service and nationally franchised HandyPro International. Listen to Paul every Saturday at 11 a.m. on “It’s Your Home, Let’s Talk About It” WAAM Talk 1600AM.


Comments
Ryan Munson
Fri, Feb 19, 2010 : 12:23 a.m.
Yes, I'll have to repaint the bathroom soon and I am glad this article came up!
treetowncartel
Wed, Feb 17, 2010 : 6:14 p.m.
You might want a note on primer if the color is even the slightest bit different, and to wait until you are ready to paint to buy tthe paint, so it is freshly shaken. Oh, and keep paint indoors for later use, you don't want it freezing.