
Real food for your dog: homemade dog treats that are easy on budgets and canine tummies
We adopted a dog at the end of August. Two days prior to receiving him, I had no plans, ideas, or thoughts about having a dog - and yet, here he is. We adopted him from a family who could no longer keep him - if we hadn't brought him in, he would've ended up in a shelter, and I just couldn't let that happen. He’s a great, big lummox-y beast with a heart of gold and a brain the size of a walnut. A Labradoodle by breeding, and a great family dog he is.

Cody, shortly after adoption, and freshly shorn of his curls.
The trouble is, he has “Lab tummy issues,” which I’ve learned are not uncommon. Many Labs are intolerant of corn and other GMO products that make their way in to commercially-available dog cookies - even the good ones with “premium ingredients.” Our dog’s tummy problems were really bad when we got him, but they are much better now, and they continue to improve. He’s somewhat “jet propelled” when he goes up the stairs, however, to our chagrin and amusement.
When we ran out of the dog cookies from Costco (with the “premium ingredients” and definitely a premium pricetag), I wanted to experiment. He wasn’t terribly fond of them to begin with (he would never take them from our hands) and at $20 per box, I knew I could try to come up with something better. As a frugalista who loves to cook and create new recipes, I was certain we could put whole ingredients in and create something Cody would love.
If you search “homemade dog treats,” you’ll come up with many, many options. I knew I wanted a whole wheat and oat treat, but it had to be corn-free. There are seemingly tons of recipes that sound good - until you get to “corn meal” in the list of ingredients, and a corn-intolerance in a dog is somewhat generic - it doesn't matter if it's corn meal, corn flour or whole corn kernels.
I ended up finding a decent recipe and tweaking it to make it work. They are easy to make and the dog LOVES them. He hangs around the kitchen when I mix them up and if I give him a bit of un-baked dough, he’s in heaven. He takes the finished treat right from our hands and when I tested them on another dog (a tiny shi-tzu), the other dog also scarfed them down. So with two resounding, “yum”-votes, here’s the recipe. Oh, and because we practice food storage habits, many of the items in the recipe come from our food storage, which makes these cookies even less expensive than otherwise.
Sue’s Whole Grain Dog Cookies
* ½ cup coconut oil or butter
* ¾ cup hot chicken or beef broth
* ½ cup milk (buttermilk or kefir can also be used)
* 1 egg, beaten
* ½ teaspoon salt (I like Redmond Real Salt)
* 3 tablespoon (heaping) parsley
* 3-4 cups whole wheat flour
* 2 cups quick oats
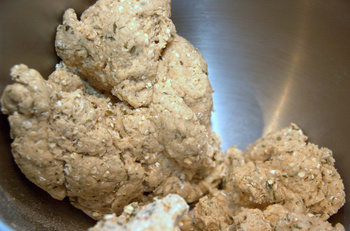
Dog cookie dough - almost ready to roll out
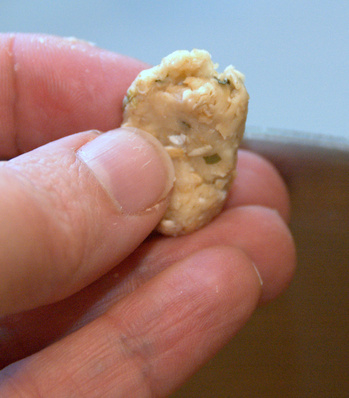
The dough should be hand-mouldable, and not stick to your fingers when it's ready to roll out.
Continue adding flour until dough is stiff and the mixer is kneading it for you (or, if kneading my hand, you can’t add in any more flour). Most of the time when I make this, I end up using the better part of 4 cups of flour, but depending on the humidity, you might find yourself going over the 4-cup mark. Don’t worry - it’s a forgiving recipe.
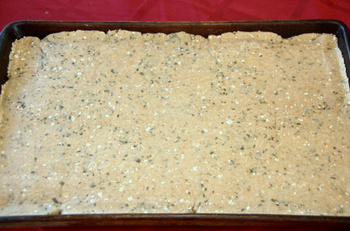
The dough as rolled edge-to-edge in a 12x15-inch jelly roll (bar) pan
Once the dough is formed, spread it out via rolling pin on your counter and use cookie cutters to form shapes (optional), or spread it in a bar pan (jelly roll pan) and roll it in that from edge to edge. This recipe easily fills one 12×15-inch bar pan without problem.
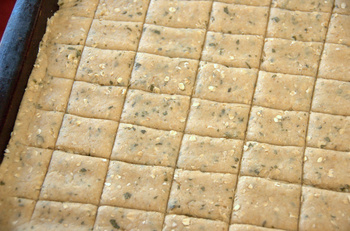
The pre-baked dog cookies that I scored (cut) with a pizza cutter
Once the dough is situated in the pan, use a pizza cutter and cut the dough in squares that are size-appropriate for your dog.
Bake at 325 degrees for 50 minutes, then turn off the oven and leave them in for another 2 to 3 hours and allow them to harden.
Cool completely and break apart with your fingers - the pre-cutting allows you to snap these babies apart easily, even though they are hard and ready for your pooch.
BONE appetit!
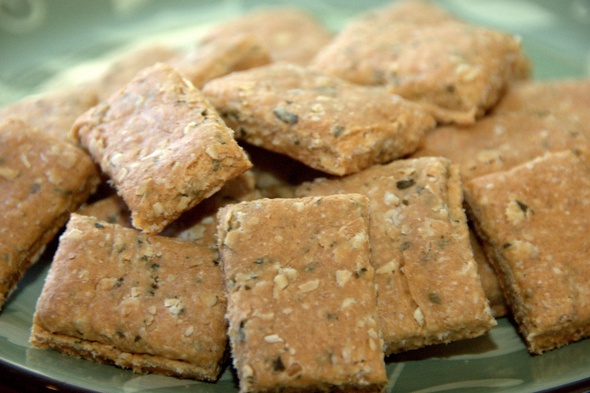
The finished dog cookies, ready for scarfing by your pooch
Sue is a wife, homeschooling mom, photographer, real-food advocate and dog-cookie baker. You can reach her via e-mail and read her regular ramblings at A Mother's Heart.
All photos, c. 2010, courtesy of A Mother's Heart Photography, Sue Talbert.
Comments
Carlyn J.
Thu, May 9, 2013 : 3:40 p.m.
Made this for my three babies. They LOVE it. We had some extra bacon fat, so I replaced 1/4c cocoanut oil with it. Extra fat-addition made even the pickiest pooch want it! I didn't have any parsley on hand, so I used a couple handfuls of Lemon Balm from our garden. It's related to mint so I'm pretty sure it freshens breath. Thanks for the great recipe!
Sue Talbert
Thu, May 9, 2013 : 5:27 p.m.
Caryln - Thank you so much for your feedback! I LOVE the idea of using bacon fat instead of coconut oil, and the lemon balm sounds perfect! :) We're now in the desert southwest and Cody went back to his original family after we fostered him, but our current dog (adopted from an abusive situation) is SO easy to train when I make these snacks for him! :) Which reminds me... I should really make him another batch. ;) Again, thanks for letting me know - this thrills my heart! :D
Sue Talbert
Thu, Apr 15, 2010 : 12:43 p.m.
Hi K- Absolutely, I think you could omit the salt. I make stock from bones and meat scraps here, so there is no added sodium, but I understand that some (most?) people use canned broth. For dogs that are older or have renal issues, leaving out the salt is necessary and I'm sure any dog would still enjoy the final product. Thanks for the idea! :)
kblank
Thu, Apr 15, 2010 : 10:28 a.m.
Hi Sue, I wonder about eliminating the salt as all broths have salt used in the canning process. Some dogs, especially older ones, have renal issues and cannot ingest much salt. It's just a thought.
Sue Talbert
Thu, Apr 15, 2010 : 7:13 a.m.
Hi LauraM - Yup, our 8 y/o's love affair with John Deere was an automatic "must have" when we got Cody his lead and collar at the store.;) Cute stuff! Have fun with the recipe; I hope your dog loves them as much as ours does! :)
LauraM
Wed, Apr 14, 2010 : 10:35 p.m.
Our dog also has a John Deere collar!! I will have to try these. I am sure our dog will like them. I could even make these without having to go to the store first!
Sue Talbert
Wed, Apr 14, 2010 : 7:29 p.m.
Hi Lorrie, What a great idea! I've actually pulled out a portion of wheat berries from my supply that I intend to sprout and make wheat grass with - I thought it might be a great way to get green in to a smoothie. :) Although I've not tried it yet, I suspect it might work just fine. The parsley in the recipe can be dried or fresh, so using wheat grass instead of parsley (or a portion in addition to parsley) would probably work well. If you have some wheat grass on hand and want to try it, please let me know how it turns out. It will be a few weeks until I have viable sprouting to use in recipes.;) Oh, and I *love* coconut oil - it's so darned healthy and is our primary oil here. :) I actually used it last weekend when in the desert on my skin and hair and it worked so well externally! I've used it as a dietary fat and not so much in other ways that I nearly forgot how rapidly it absorbs in to the skin. Our dog loves it too, when we give him chunks of it to lick at and chew. :)
Lorrie Shaw
Wed, Apr 14, 2010 : 5:03 p.m.
Sue, these sounds perfect for our dogs! I wonder how wheatgrass would fare in this recipe? I love the idea of using coconut oil. Your pooch is adorable, by the way. What a face!
Sue Talbert
Wed, Apr 14, 2010 : 4:23 p.m.
Hi jeanarrett, Ya know, as these bake, they smell REALLY good! Our son commented that they smelled like "people food," and as we looked over the recipe, there's nothing in them that would make them unsuitable for people, except maybe the extra-crunchy texture.;) I do not grease the pan - I don't want the dough moving around when I cut it before baking. I have found that as the cookies dry and shrink in the cooling (and then cold) oven, they pull away from the sides of the pan beautifully. I have never had a problem with them sticking once they are dry and I'm breaking them up. :) I hope this helps!
jeanarrett
Wed, Apr 14, 2010 : 4:18 p.m.
I would almost eat these myself! My question is: do you grease the pan first? Thanks--
Sue Talbert
Wed, Apr 14, 2010 : 2:12 p.m.
Thank you, Pam. Somehow, this great big dog with a tiny little brain has captured my heart. I made a batch of cookies just before lodging him in a kennel last week and was so glad to see he did well and ate almost all of them during his stay there. :)
Pam Stout
Wed, Apr 14, 2010 : 1:53 p.m.
We have a much loved golden doodle and I can relate in so many ways. Cody (also the name of our previous dog) is lucky to have you make homemade treats for him.